
Tumbling jasper and agates is an incredibly rewarding experience. Ask any lapidary enthusiast, and you’ll quickly discover that there are as many “secret recipes” for achieving a brilliant polish as there are people tumbling stones. That endless experimentation is part of the fascination!
However, a persistent myth in the rockhounding community is that tumbling slabs is either terribly difficult or flat-out impossible. While I don’t claim to be the ultimate authority, I have developed a reliable method for beautifully polishing slabs, and I’m excited to share my process with you.
1. Equipment and Preparation
The first thing to consider is the size of the slabs you want to tumble, as this dictates your equipment.
- Small Slabs (2 to 3 inches): A standard small tumbler works perfectly.
- Large Slabs (up to 6 inches): You will need a larger barrel. A 12-pound tumbler (like a Lortone or any comparable rotary model) is ideal for accommodating about ten slabs measuring 3×6 inches.
A Note on Capacity: The golden rule is that the slabs must be able to move freely as the barrel rotates. If your slabs are wider or slightly longer than 6 inches, simply reduce the total number of slabs in the barrel.
Expect some breakage when tumbling slabs, especially if the stones have existing fractures. However, we can heavily minimize this by using the right cushioning material.
Choosing Your Tumbling Media
To cushion the slabs, add tumbling media until the barrel is filled to about 1 ½ to 2 inches from the top.
- Recommended: Small-sized rose quartz, very small carnelian, or ceramic media.
- Avoid: Plastic pellets, sawdust, or very soft materials like road gravel. These will just gum up the process and ruin your finish.
The Glass Jar Analogy:
Why use smaller stones for cushioning? Imagine dropping a glass jar on soft sand versus dropping it on large, hard rocks. On sand, the glass survives; on rocks, it shatters. In your tumbler, small media acts like the sand, eliminating the harsh banging that would occur if you loaded the barrel strictly with medium-sized, hard rocks.
I personally prefer rose quartz. It shares the same hardness as jasper and agate but is far less tough, so it behaves as if it were a softer stone. Plus, it yields some beautifully polished fine stones by the end of the process!
2. The Liquid Formula
For a 12-pound tumbler, I use a specific liquid blend to optimize the slurry:
- 22 Ounces (by volume) of Tap Water: This is slightly less than generally recommended, but it allows the grit to break down into a slurry much faster.
- A Generous Squirt of Jet Dry: Adding this dishwasher rinse aid to every single load is a fantastic trick to make cleanup significantly easier.
3. The Tumbling Stages
Depending on how your slabs were cut, you will enter the tumbling process at different stages. Below is a quick-reference guide to the progression.
Stage 1: The Initial Grind (7 to 10 Days)
Your starting grit depends entirely on the condition of your slabs:
Option A: Smoothly Cut Slabs (Minimal Saw Marks)
If your slabs are already quite smooth, you can skip the roughest stage. Add 10 ounces (by weight) of 220 grit to your water and Jet Dry mixture.
Option B: Rough Cut Slabs (Visible Saw Marks)
If the cuts aren’t smooth, you must start with 60/90 grit (or 80 grit). Because a 12-pound tumbler takes quite a while to completely break down coarse grit, you need a good slurry to efficiently carry the grit to the slabs.
- Pro-Tip for Coarse Grit: To fast-start your slurry, add about 4 ounces of dried sludge from a previous load, plus an extra 2 to 3 ounces of water (always maintaining that 1 ½ to 2-inch gap at the top of the barrel).
Run this stage for 7 to 10 days. I usually get impatient and check on day 7! Feel the lid of the barrel—if the grit has broken down completely, you are ready to clean. If not, clean the gasket, adjust the water if it seems too thick or thin, and let it run a bit longer. It is crucial to use the grit completely; as it breaks down, it creates a finer finish that prepares the stone for the next stage.
(Note: If you started with 60/90 grit, you will need to run the 220-grit cycle next before moving on to the Fine Grind).
Stage 2: The Thorough Clean
Once the grit has broken down, it is time to clean. If you plan to reuse your media stones in the same grit stage later, a simple rinse is fine. But for your target slabs, a meticulous cleaning is required.
Crucial Cleaning Rules:
- Rinse in a bucket. NEVER rinse your barrel into a sink that drains into your home’s plumbing.
- Avoid the yard. Don’t dump the slurry on your lawn, as the dried grit will form a barrier that suffocates grass.
- Ultrasonic finish. After a good bucket rinse, I place the slabs in an ultrasonic cleaner filled with water and another squirt of Jet Dry.
- Dry and inspect. Dry the slabs with an old towel to check the finish. If they look good, move to the next stage.
Stage 3: The Fine Grind (7 Days)
If the 220-grit stage was successful, it’s time to move to 1000 or 1500 grit.
I prefer to use a very thick, pudding-like slurry for this stage as it perfectly cushions the stones. You can achieve this using small stones or ceramics, combined with the fine grit, 22 ounces of water, and Jet Dry. Run this stage for another 7 days.
Stage 4: The Final Polish (14 Days)
To achieve that mirror finish, you must use a dedicated barrel for polish only. Never use this barrel for silicon carbide grit, as cross-contamination will ruin your polish.
- Ensure your slabs are as flawlessly clean as possible.
- Add reusable ceramic media (it wears down very little and doesn’t interfere with the polish). Fill the barrel with slabs and ceramics to 1 ½ inches from the top.
- Add the standard 22 ounces of water and a squirt of Jet Dry.
- Add Aluminum Oxide polish (10,000 grit / 2-micron size). I prefer this because the particle size is already smaller than other types of Aluminum Oxide.
- Run for 2 weeks.
The Final Reveal
When those two weeks are up, all that is left to do is clean your slabs one last time. While you might occasionally find a broken piece, if you’ve followed these cushioning steps, many times they all survive intact.
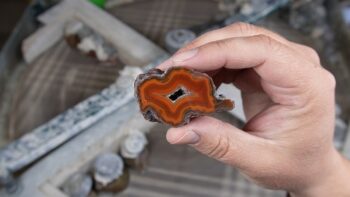
Opening that dedicated polish barrel, cleaning off the slurry, and revealing a beautifully fine, bright polish on a large slab is an unmatched thrill.
 CRY217
 MAL126
 MAL155